Showing posts with label Playdough Playoff. Show all posts

Friday, March 30, 2012

Playdough Playoff - The Dryness Test

Pin It One factor I look for in The Best Homemade Playdough is how quickly it dries out.  Amazingly fun activities like playdough usually go from breakfast to meltdown.  V. will play with dough until she can't do a single thing and needs a nap right then.  The last thing I want is to get done changing V., putting her down for a nap, maybe going to the bathroom, forget what I was doing and start cleaning something, and then remember an hour later that I had playdough to clean up, finding it all dried up.  (This happens far more often than it should.)

I decided to line up small bits of playdough and see how long it took them to dry out.

4:25 - Fresh dough!
L-R: Classic dough, Jell-O dough, "rubbery" dough, Kool-aid dough, No-Cook dough.


5:25 pm:  The doughs are holding up fairly well with the exception of the "rubbery", gluten-free, purple dough in the middle.


9:30pm (had to leave the house for a while...)
The green, yellow, and orange dough were crusty, but not hard.  The purple dough is completely gone (but easy to clean up, as it is just dust!).  The (red) Jell-O dough is drier than it was, but not to the point where it is crusty!  I'll leave them out overnight.


7:30am - None have any fight left.  The green, purple and orange are the most crumbly, meaning they would be the easiest to get out of carpet, upholstered furniture, and abandoned toys.  If you wanted to sculpt and dry something, the yellow and red would be best, but they would need a few days to dry.

The Great Playdough Play-Off! Today!

Pin It After days of playdough cooking, applesauce eating, and tool gathering, it is finally Friday, and that means Playgroup!

First, the set-up:
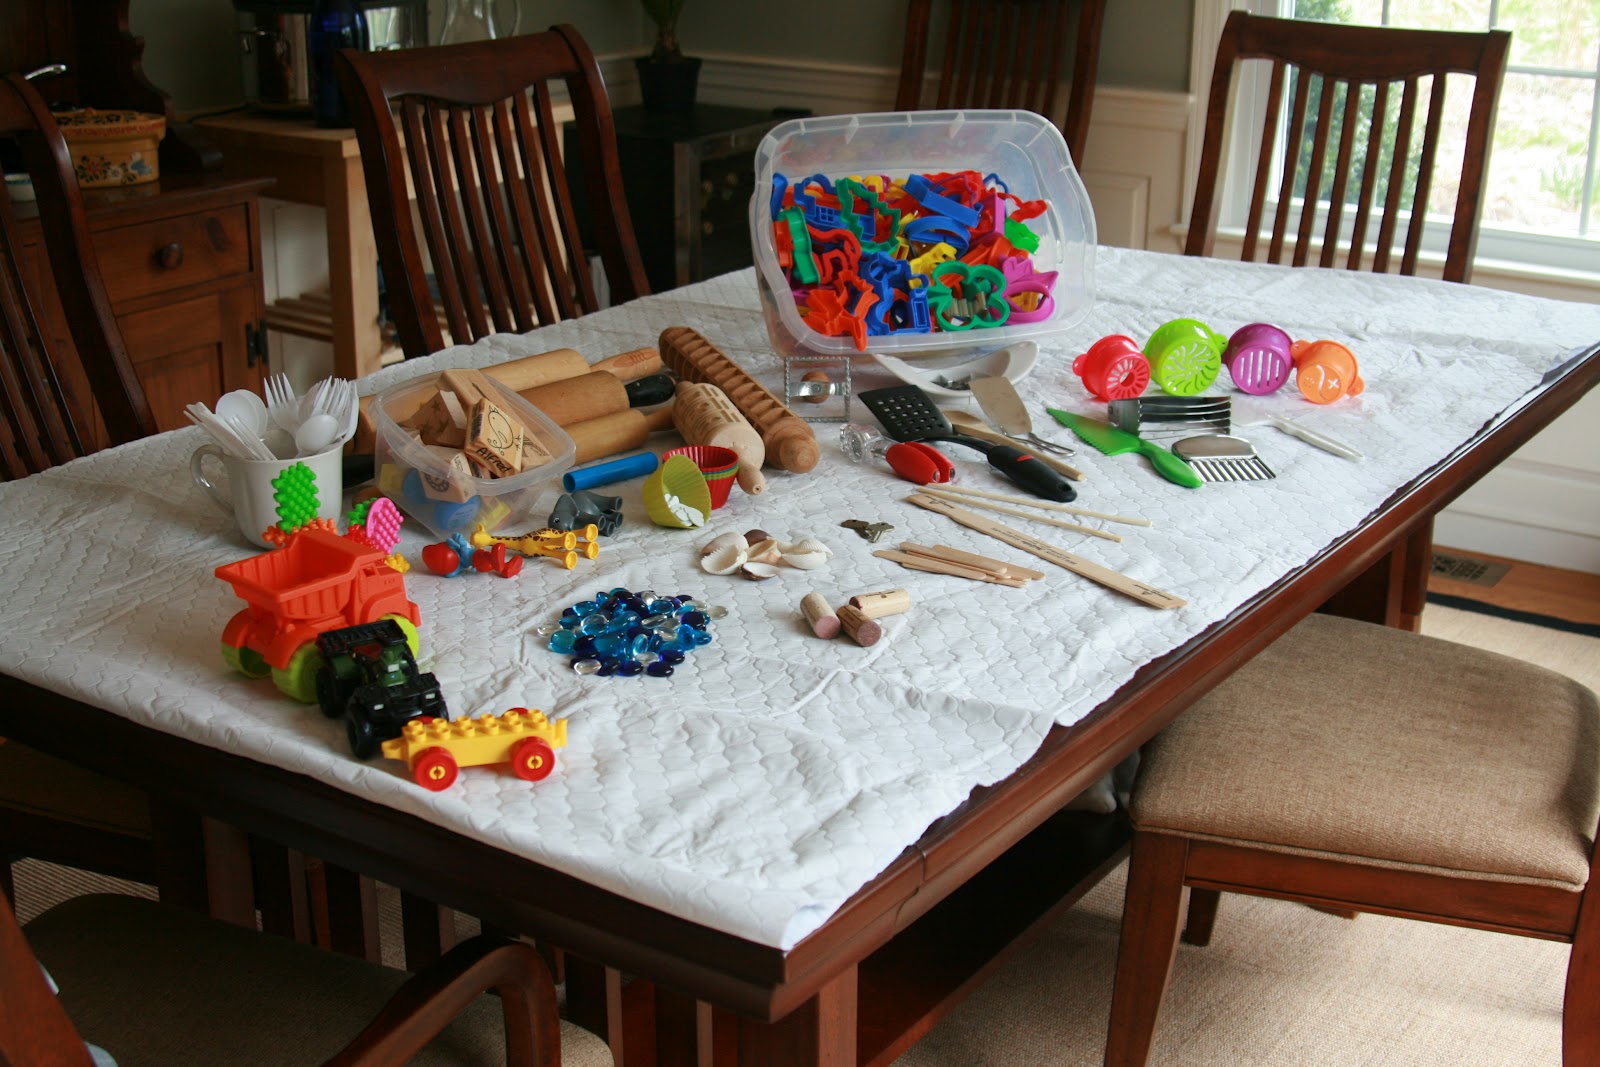
I ran around the house and found things with which to cut, mold, imprint, press into, and roll the dough.  Shells, stamps, beads, cookie cutters.  I also took this picture to show that I have a vinyl and fabric pad under the table cloth (also vinyl and fabric) because I'm having toddlers cut on my diningroom table.  (Not a single scratch was made!)

One of our friends brought those awesome Play-Doh presses and monsters, so we had a ton of stuff with which to explore!


On to what we came here to figure out: Which dough reigns supreme?
The Amazing Kids of Playgroup (and their amazing moms!) were given a tub of each kind of dough.
Then we got to work.
My child thought the stamp was better than the dough.

As you can see, our testers were very serious about their work.
The purple, gluten-free (formerly "rubber") dough was the least popular.  Notice how it didn't leave the tubs.  
 The orange, no-cook dough was still a little sticky, but was very fun to squish.  Therapeutic?  Yes.  Easy to clean out of Play-Doh toys?  Not so much.  Regardless, this one gets the Mom Award.  It is quick to make (once you get the ratio down... there are so many variations, I may try a cold water recipe next), is ready immediately (no cooling time), and is squishy like playdough should be.


The classic dough (green) was well-liked and isn't at all sticky.  V. enjoyed when we made some textured doughs by pressing the cup bottoms or Clipo blocks into the dough, and  the green dough was the only one that I didn't find stuck in the blocks when all was said and done.  This wins for Easiest Clean-Up.

The yellow Kool-Aid dough was used quite a bit, and smelled like lemonade.  This isn't sticky to the touch, but I've scraped it out of many toys and off several surfaces.

Lastly, the Jell-O dough (red) wins the Most Eaten award.  This was the one most of us ended up fishing out of mouths, and how can you blame the kids?  It looks and smells like Jell-O.  Nothing in the dough would hurt someone were they to eat it, but it isn't particularly tasty (to adults, I guess) or full of great-for-you things.  My child, who ate her share, still ate all her lunch and is not showing signs of a sour stomach, so I'm guessing she is just fine.  
ALSO: This dough kept fine on the counter, and was color-fast once completely cooled.  Even better!

And then the kids busted out the pasta dryer, and a great deal of pasta was made.

So which is The Best Playdough?

It depends on what you are looking for.  If you want something that is going to take more time to make and cool down but won't stick to anything, go with the Classic Dough.

If you want something that will come out vibrant and amazing-smelling, go with the Jell-O dough.

Maybe you want dough NOW and don't have time to tend dough on a stove.  Then go with the no-cook dough.  (Remember, this is sticky when warm, but will get better as kneaded/aired.  If your kids just can't wait, flour their hands and let them smoosh it all over the inside of a bowl.)

Try one (or three, or all five!) and see if it works for you!

What was really The Best was the communication around the table.  There were many things on the table toddlers don't typically use, so many tools were requested ("that!") and then labeled.  We talked about colors, smells, and in a roundabout way, taste.  Lessons about sharing were also had... important, difficult lessons for toddlers, especially when dealing with Cool Toys.

If you want to have some fun, whip up some playdough and invite some friends!

(Or hide some in Easter eggs for a fun holiday surprise!)

No-Cook Playdough

Pin It
After cooking four megabatches of homemade dough, I was really looking forward to making one that didn't involve a stove.

The ingredients are nearly identical to the classic dough, but with the promise of no cooking, this could be a home run.

Ingredients:

3.5-4* c. flour
3 Tbs cream of tartar
1 c. salt
6-8* Tbs oil (scented or not)
food coloring
4 c. boiling water

*I started with 3c flour and 4 Tbs oil as instructed by my recipe.  It was obvious that this wasn't going to work, so I continuously added more flour and oil.  This dough was very sticky when I made it.  As it cooled I worked in some additional flour (I got up to 4c) and oil (I used about 6 Tbs I think.  I got frustrated and just poured at one point...).  Let it cool (maybe on a cookie sheet?) and then keep working with it until you get it to where you want it.

Put all the ingredients into a bowl, adding the water last.  Stir.

And keep stirring.

I wanted it to be orange, so I squirted red and yellow food coloring gel into the flower.  It made for some very vibrant spots! I really liked the tye-dye look while it lasted, which wasn't too long with all the kneading.


5 doughs made, 1 bought, and all we need are some friends to test it out!

Wednesday, March 28, 2012

Tale of Two More Doughs

Pin It I made Dough D and Dough E today, otherwise known as the "rubber" dough and Kool-Aid dough.

Dough D - rubber dough.


Tell me, what do you think when you hear "rubber dough"?  Silly putty?  Half-dried rubber cement?  Sticky tack?
I had no idea where this was going, but I was hoping it was more on the lines of silly putty.

Here are the ingredients:
 2 c baking soda
1 c corn starch
1.5 c water
food coloring (I chose purple)
a few drops of essential oil, if desired (I chose lavender, finally)

Which, of course I doubled, which made about 4 cups at the cost of $4.50.  Not the cheapest one yet.

If you ever made oobleck, you know what mixing equal parts corn starch and water will get you.  (If you don't, stop reading and go try this right now.)  The instructions said to mix until there were no lumps.  Here's the thing.  You now have a bowl of soupy oobleck.  Fun to mix, not fun if you are trying to get the lumps out.  When in motion, oobleck is a solid.  When still, it is a liquid.  And you've added baking soda, which makes lumps.  The best solution I found is to (next time) mix the water and baking soda, and then add in the corn starch.  Get it to a point where you believe there aren't any lumps, and pour it all in a pan.  (Add in the color and scent in the mixing, too.)

I read somewhere that cooking playdough in a sauce pan made it cook faster.  This makes sense - more surface area.  So I decided to try that.

Not a far cry from the boiling mud pits of Yellowstone.

This took a bit longer to cook (even in the pan) and left a film on the bottom of the pan that came up easily, but you don't want to get it mixed into your dough, or it will leave hard chunks.

Once it did ball up, I rolled it out into a bowl to cool.  V. was chomping at the bit to get in on the dough action, and she enjoyed this one the same as the rest.

I, however, did not.

I thought maybe it was because it was warm, but even cooled, this leaves a crusty film on everything it touches, hands included.  My skin is dry enough - it doesn't need help.
At least it smells good!

What I liked about this dough: It is gluten-free.  This isn't a huge deal for us, thankfully, but if you have a child on a GF diet and they like to eat everything, this dough might be worth making for you.  It tastes awful, too, so even if you don't need the GF, one taste and the likelihood your little one will try it again is slim to none.

What I would change:  This dough leaves a salt-like crust on everything, which irritated my hands.  And just as quickly as it will dry your hands it will dry itself out.  Even when cooling, it got crusty on top.  There is nothing rubbery about it, which was a disappointment.  It is more like salt dough than anything.


Dough E: Kool-Aid Playdough


I was sorely tempted to buy grape Kool-Aid, as I was certain it would smell like all things childhood. Given that the Jell-O playdough seemed to be leaking some color, I didn't think any moms would thank me for giving their kid pink and purple staining doughs.  I settled on lemon.

Ingredients:

2 cups flour
1/4 c salt
2 Tbsp cream of tartar
2 envelopes Koolaid
2 cups water
2 Tbsp + 1tsp vegetable oil 

Mix in a saucepan and cook over medium heat until it gets clumpy.  Reduce heat and stir until it forms a ball.  Pour out on to surface or into a bowl to cool.  

Mine came out a little stickier than most had at this point, so I added the 1 tsp oil and kneaded it in with floured hands.  This dough turned out soft and fluffy!  I had to add yellow food coloring as the yellow Koolaid was more of a bland manilla color, and I wanted bright!  The lemon scent isn't terribly obvious, but the more it cooked, the more I could smell it.  

By time this batch was done, V. had enough playdough for the time being, so there are no cute pictures.  Sorry.

What I like about this:  The smell, the fluffiness, and how nicely it came together after turning out so sticky at first.

What I would change: I don't know if the darker colors will stain or not.  Also, the color wasn't as vibrant as I was hoping for, but that was easily remedied.  
Tuesday, March 27, 2012

Jell-o Playdough

Pin It


My husband doesn't embrace mess the same way I do.  He likes to look at the pictures after I've cleaned the kitchen. I took the above photo just for him.  That is honestly as messy as making playdough gets and, because it is mostly flour and water, it washes off easily.

The Jell-O dough is very similar to the classic dough in both ingredients and method.  The website I originally found this on warned that it would burn very quickly, but I didn't notice any difference in the cooking method or potential burn rate.

Since I wanted to double the batch but only had one packet of Jell-O, I made some variations to the recipe plastered all over the internet.  Here is my double-ish recipe, yielding 3.5 cups and costing about $3 per batch.  (Had I known this Jell-O was destined for Playdough glory, I would have bought the much-cheaper-but-every-bit-as-smelly store brand gelatin.)

Ingredients:

2 c flour
4 TBS salt
2 TBS cream of tartar
2 TBS oil (I used vegetable, knowing this would be plenty smelly without essential oils.)
2 c water
1 3oz packet of Jell-O, any flavor.  Warning - you may want to choose a lighter color.  Staining may be an issue.

Put all the ingredients in a saucepan.  Stir well, and place over medium heat.  At first, stir it every 20-30 seconds, giving it a good scrape around the edges of the pot.  When it gets clumpy, turn the heat to low and stir until it forms a cohesive mass.  Turn the ball of dough out on to a plate or the counter and let cool for a few minutes before kneeding.


This time, she wanted to smash it with a spoon.


What I like about this dough:  Even though I raised the amount of water and flour, the dough came out a brilliant red.  (I used cherry Jell-O.)  It smells delicious.  I forgot myself at one point, put my doughy finger in my mouth, and promptly spit it out (even though it wasn't that bad) as my watchful child said "no no!" and laughed at my folly.  She had fun smelling it, but after my display, didn't try to eat it.

What I would change:  This turned our hands a little pink.  I'm not sure if it was because it was still hot or if it will stain even when cooled.  We will test it tomorrow to be sure, in case I need to warn moms.  Also, about half the recipes I saw said the dough would keep for a few days if refrigerated.  I am storing a small bit on the counter in a plastic container, and the rest (also in a plastic container) in the refrigerator.  I will let you know what comes of this.

Classic Homemade Playdough

Pin It
Dinner was in the crock pot and the Dinner Cooking Hour struck.
I need to cook.  I love to cook.  And the baby was waiting for her daily cooking show.

I decided to go ahead and make a few doughs tonight, just to get it under way... and because I couldn't wait any longer.

Start with the Classic Dough.

This is the dough I made for my nanny babies, students, kids I babysat, and now my kid.
You can add a million things into this dough - fresh herbs or coffee grounds being the most alluring to me.  I'd also like to make it with herbal tea water instead of regular water.

For this batch I kept it unscented and dyed it blue.  It oddly turned seafoam green.
I also doubled the recipe below, making about 3.5 cups total and costing under $2.

Recipe:
1 c Flour
1 c Water
1/4 c Salt
1 TBS Oil (I used vegetable, but in retrospect, I should have used lavender oil... next time!)
2 tsp Cream of Tarter
Food coloring
Sauce pan & wooden spoon


Put all the ingredients in a saucepan.  Stir well, and place over medium heat.  At first, stir it every 20-30 seconds, giving it a good scrape around the edges of the pot.  I find that constant stirring will wear you out, but if you let it cook just a little then stir, it comes together without giving you Rambo forearms.  Particularly if you doubled the recipe.  When it gets clumpy, turn the heat to low.


Once it starts to form a ball and comes off the bottom of the pan, turn it onto the counter or a plate.  Let it cool for a few minutes, if you can resist, and kneed it a few times.  This is my favorite part.  I love when the dough is still warm and at its squishiest.  


V. had played with salt dough, pasta dough, cookie dough, and Play-Doh before, most experiences ending prematurely due to a propensity to eat the dough by the mouthful.  Now, a bit older, she gets that playdough it isn't for eating.  (The sensory bin is not at the table behind her because she was sneaking bites of cloud dough...) 


If it isn't for eating, what is it for?


She really got into it!

I made a cat for her.
Since having the sensory bin out, V. has learned that I will let her use most anything to explore with.  When I started the Jell-o dough I was shaking the packet, and she promptly requested it.  She spent 5 minutes pinching off small balls of dough to put into the beg through the corner I tore off.


Why I like this dough:  It is easy to make using ingredients I have.  It is soft, it doesn't dry out as quickly as other doughs (it is all about the salt - don't choose one with more than 1/4c salt per batch) and you can stir in all sorts of things to make it a more sensory experience.  Think of all the textures and scents you or the kids could mix in!

Things I would change: nothing.  If you make it right, it isn't sticky, doesn't stain, and is smooth.


The Great Playdough Play-Off

Pin It

It is no secret that I love Pinterest.  I love having one place to put all these things I come across, cutting down on the amount of tabs I have up.  (Currently 14 tabs... aside from when I bought my computer, this may be an all-time low.

At the peak of my playdough making, I was cooking up batches for my nannybabies and all their friends weekly.  I was a machine.  But the kids got older, the weather got nicer, and I lost my paper copy of the recipe.  You can imagine my joy when a near-identical recipe floated across my Pinterest page!

Then another dough recipe popped up, with glitter!  Then another, claiming to be no-bake!  Peanut butter, oat meal, Jell-o, Kool-Aid (my stepmother used to make this one when we were little kids!) ... it seems you can make Playdough out of nearly anything in your kitchen, and it is all food-based.  (I know Play-Do is non-toxic, but it isn't food based.)

I pinned them all and forgot about most of them.  (I used the salt dough recipe to make hand print ornaments with playgroup, and it was the best salt dough I've ever worked with.  Moms had just as much fun as the kids!  I also used the cloud dough, still in our sensory bin.)

Pam, friend and amazing teacher, asked me for a favorite playdough recipe.  I gave her a link to my nanny favorite, and saw all the other ones I had "pinned", all claiming to be The Best.  Maybe my favorite dough isn't The Best.

Well, there is only one way to get to the bottom of this: Playdough Play-Off.

I'm hosting playgroup this week.  What better than a bunch of 1 & 2 year olds to test out the various doughs?  I am aware that their articulated feedback may not be fantastic, but that is not important to my study.

I've been rounding up the doughs.  Due to allergies, I won't be making peanut butter dough for this group.  I may make some for V. to try out on Saturday.

So far I've decided on these, finding them all on Pinterest using the phrase "best playdough".

Dough A, Classic Homemade Dough

Dough B, Jello Dough

Dough C, Rubbery Dough

Dough D, No-Cook Dough

Dough E, Kool-Aid Dough

Dough F, Play-Doh - the control, if I can find it cheap.  (It usually is this time of year.)

I could go on.  There are recipes that are the classic recipe with "stir-ins", such as cocoa, glitter, and spices, including pumpkin pie or chai, even coffee grounds... can you imagine?!  Even though they are food product, I think giving a bunch of 18-month-old children dough that smells like chocolate or pumpkin pie may lead to consuming larger-than-recommended amounts of dough.  (Especially if I let the coffee-scented dough loose around moms at 10am!)

With my little scientist in tow, I'm going to spend the week making doughs and giving initial observations.  Then, on Friday, the Playdough Play-off will be held!

Stay tuned!


I want playdough now!